> ## Documentation Index
> Fetch the complete documentation index at: https://docs.anlytic.com/llms.txt
> Use this file to discover all available pages before exploring further.
# Team configuration
Teams allow you to organize members, control access, and collaborate efficiently within the Anlytic platform. This section explains team roles and how to create, manage, and update teams.
## Team roles
Users added to the workspace can be assigned different roles, each defining what they can view, access, and manage within the workspace and its teams. The available roles include:
**Guest:** Guests have access to the workspace and can view content shared with them. They can also be added to teams by managers, but they cannot create or edit dashboards or visualizations.
**User:** Users have access to the workspace and can be added to teams by managers. They can interact with shared content according to the permissions assigned within each team but cannot manage workspace settings.
**Manager:** Managers can add or remove users from the workspace. They can also create teams, assign roles, and manage team membership and settings.
**Admin:** Admins have full access to all teams, users, and workspace resources. They can manage workspace settings, user permissions, and all shared content within the platform.
## How to create a team?
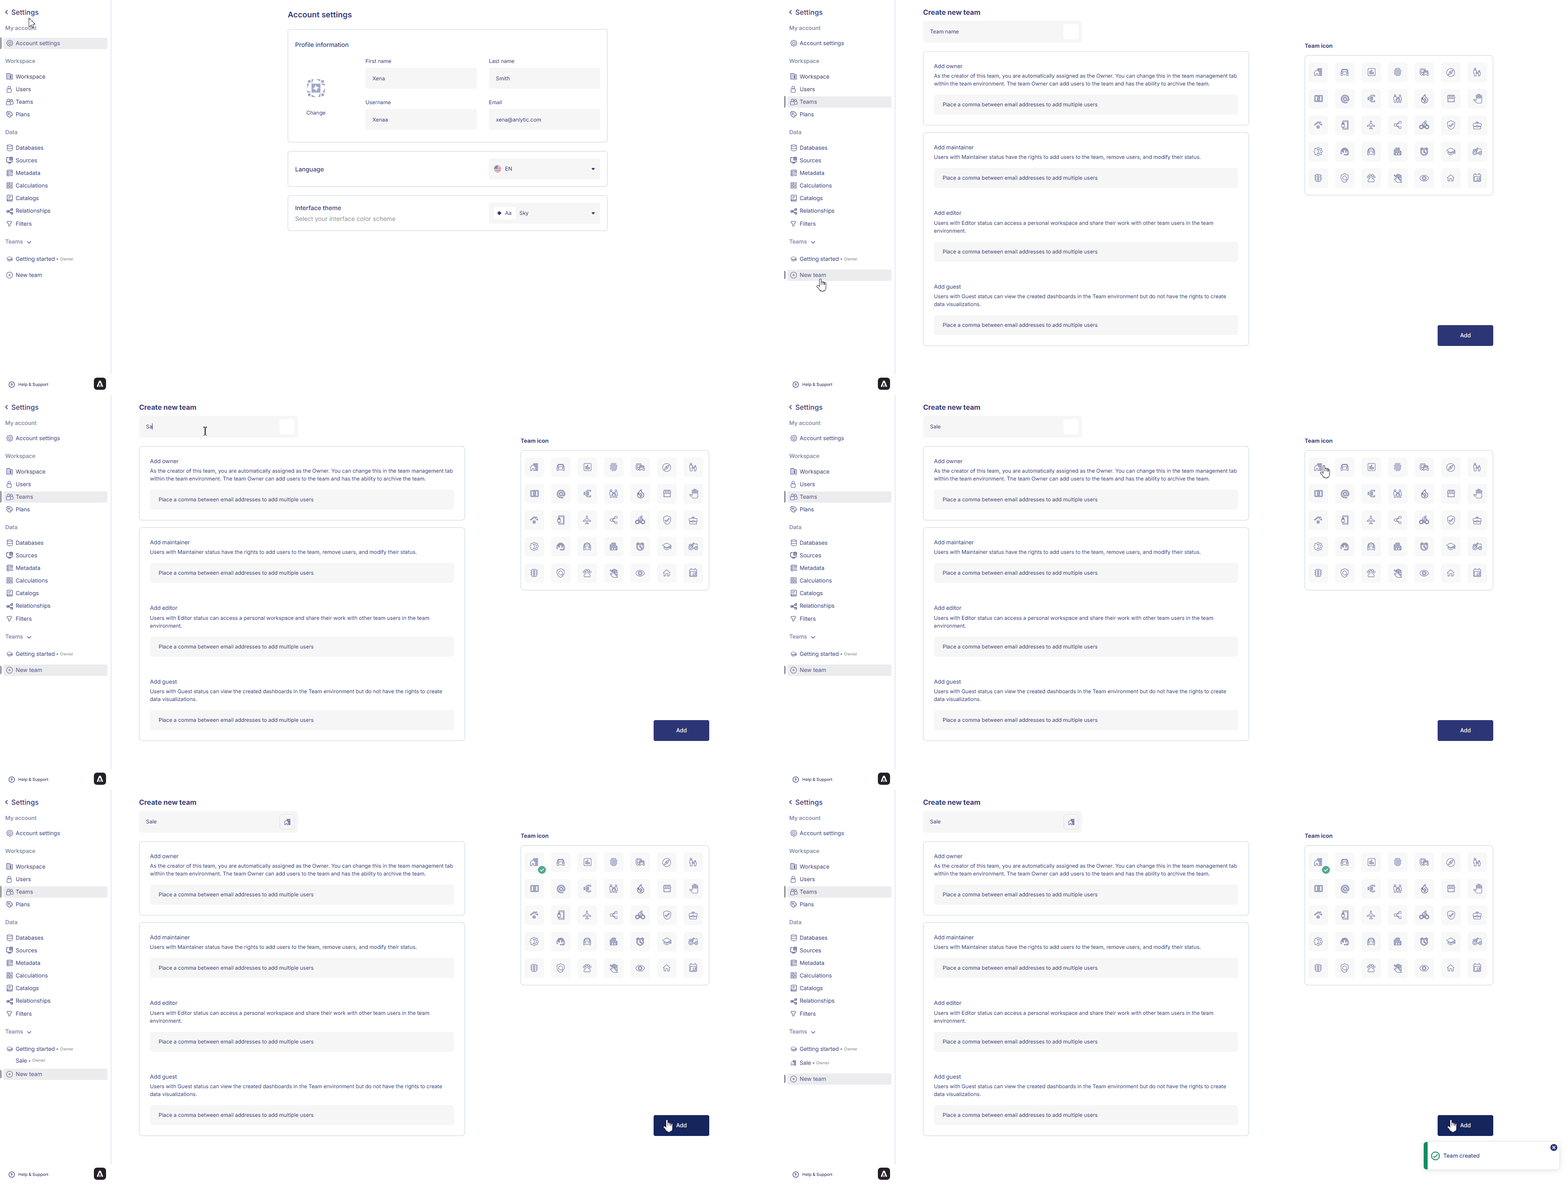
Follow the steps below to create a new team:
1. Click the **workspace name** in the left-hand sidebar and select **Settings** from the menu.
2. In the sidebar, select **New team**.
3. Enter a **team name** and choose a **team icon**.
4. Click **Add** to create the team.
 ## Inviting users to a team
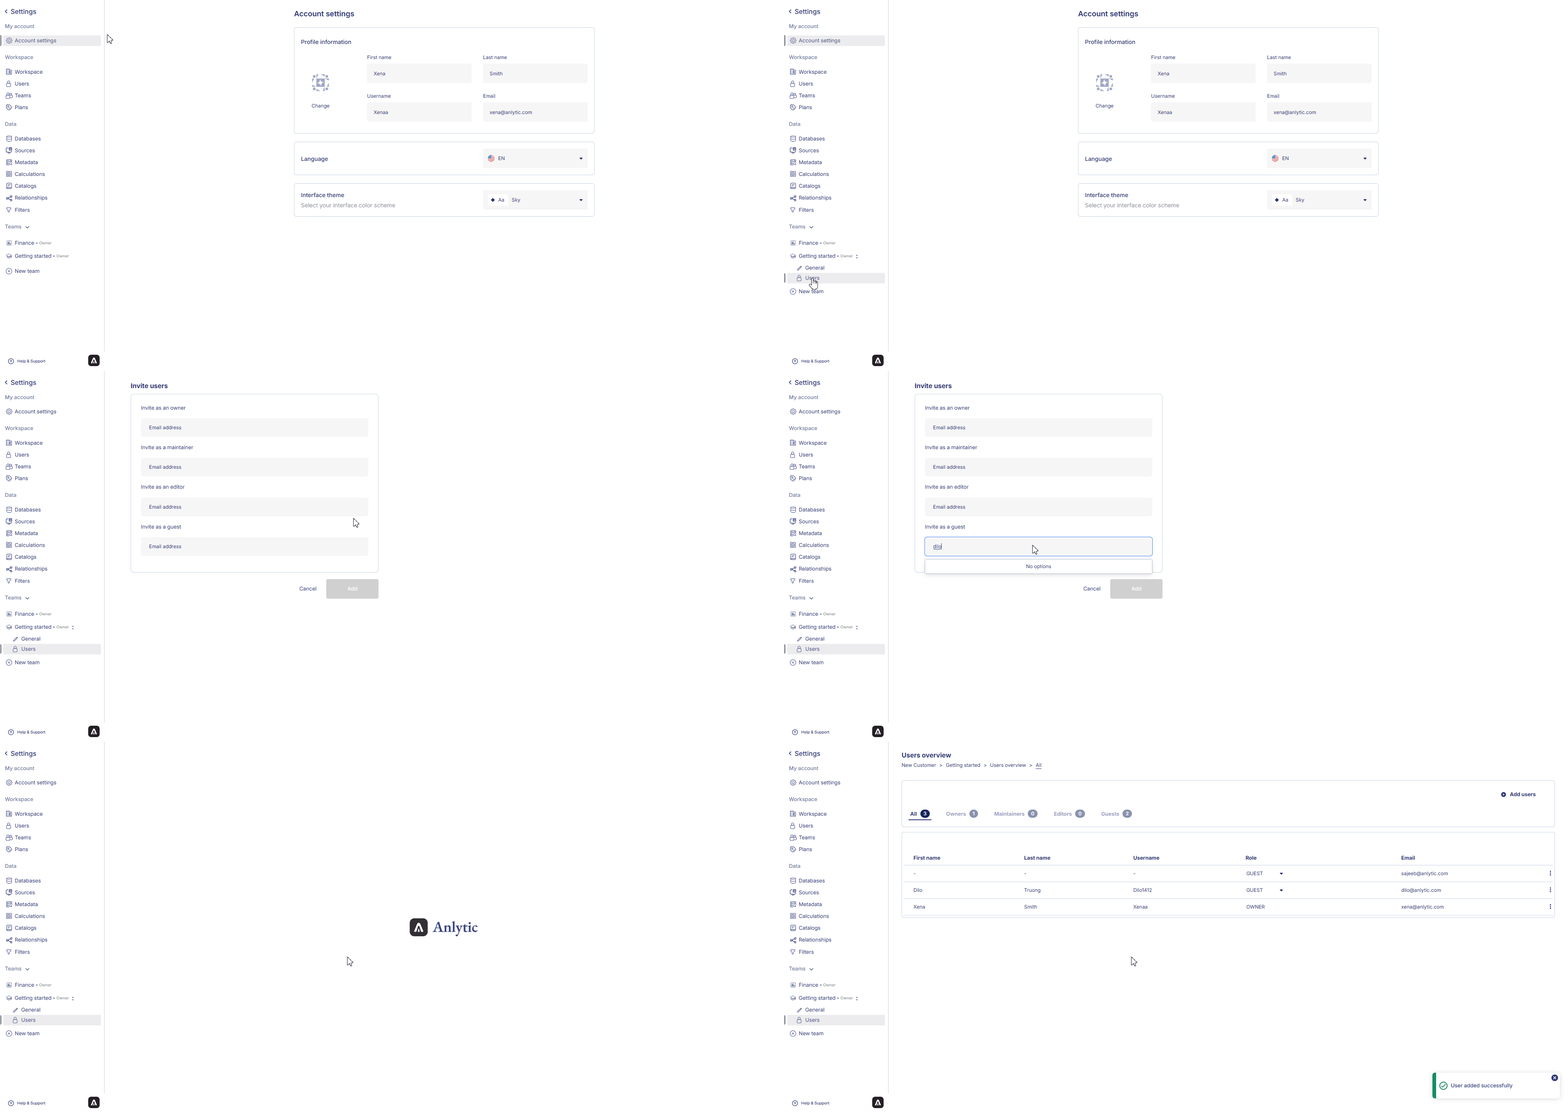
Once your team is created, you can invite workspace members to join the team:
1. In **Settings**, select the **team name**.
2. Two tabs will appear: **General** and **Users**. Select **Users** to open the team user list.
3. Click **Add users** in the top-right corner.
4. Enter the user’s **email address**, then choose a role (Owner, Maintainer, Editor, or Guest).
5. Click **Add** to add the user to the team.
## Inviting users to a team
Once your team is created, you can invite workspace members to join the team:
1. In **Settings**, select the **team name**.
2. Two tabs will appear: **General** and **Users**. Select **Users** to open the team user list.
3. Click **Add users** in the top-right corner.
4. Enter the user’s **email address**, then choose a role (Owner, Maintainer, Editor, or Guest).
5. Click **Add** to add the user to the team.
 ## Removing a user from a team
To remove a user who no longer needs team access:
1. Go to **Settings**, select the **team name**, and open the **Users** tab.
2. Click the **⫶** options menu next to the user’s name.
3. Select **Delete**, then confirm the action by clicking **Delete** again.
## Removing a user from a team
To remove a user who no longer needs team access:
1. Go to **Settings**, select the **team name**, and open the **Users** tab.
2. Click the **⫶** options menu next to the user’s name.
3. Select **Delete**, then confirm the action by clicking **Delete** again.
 ## Editing or archiving a team
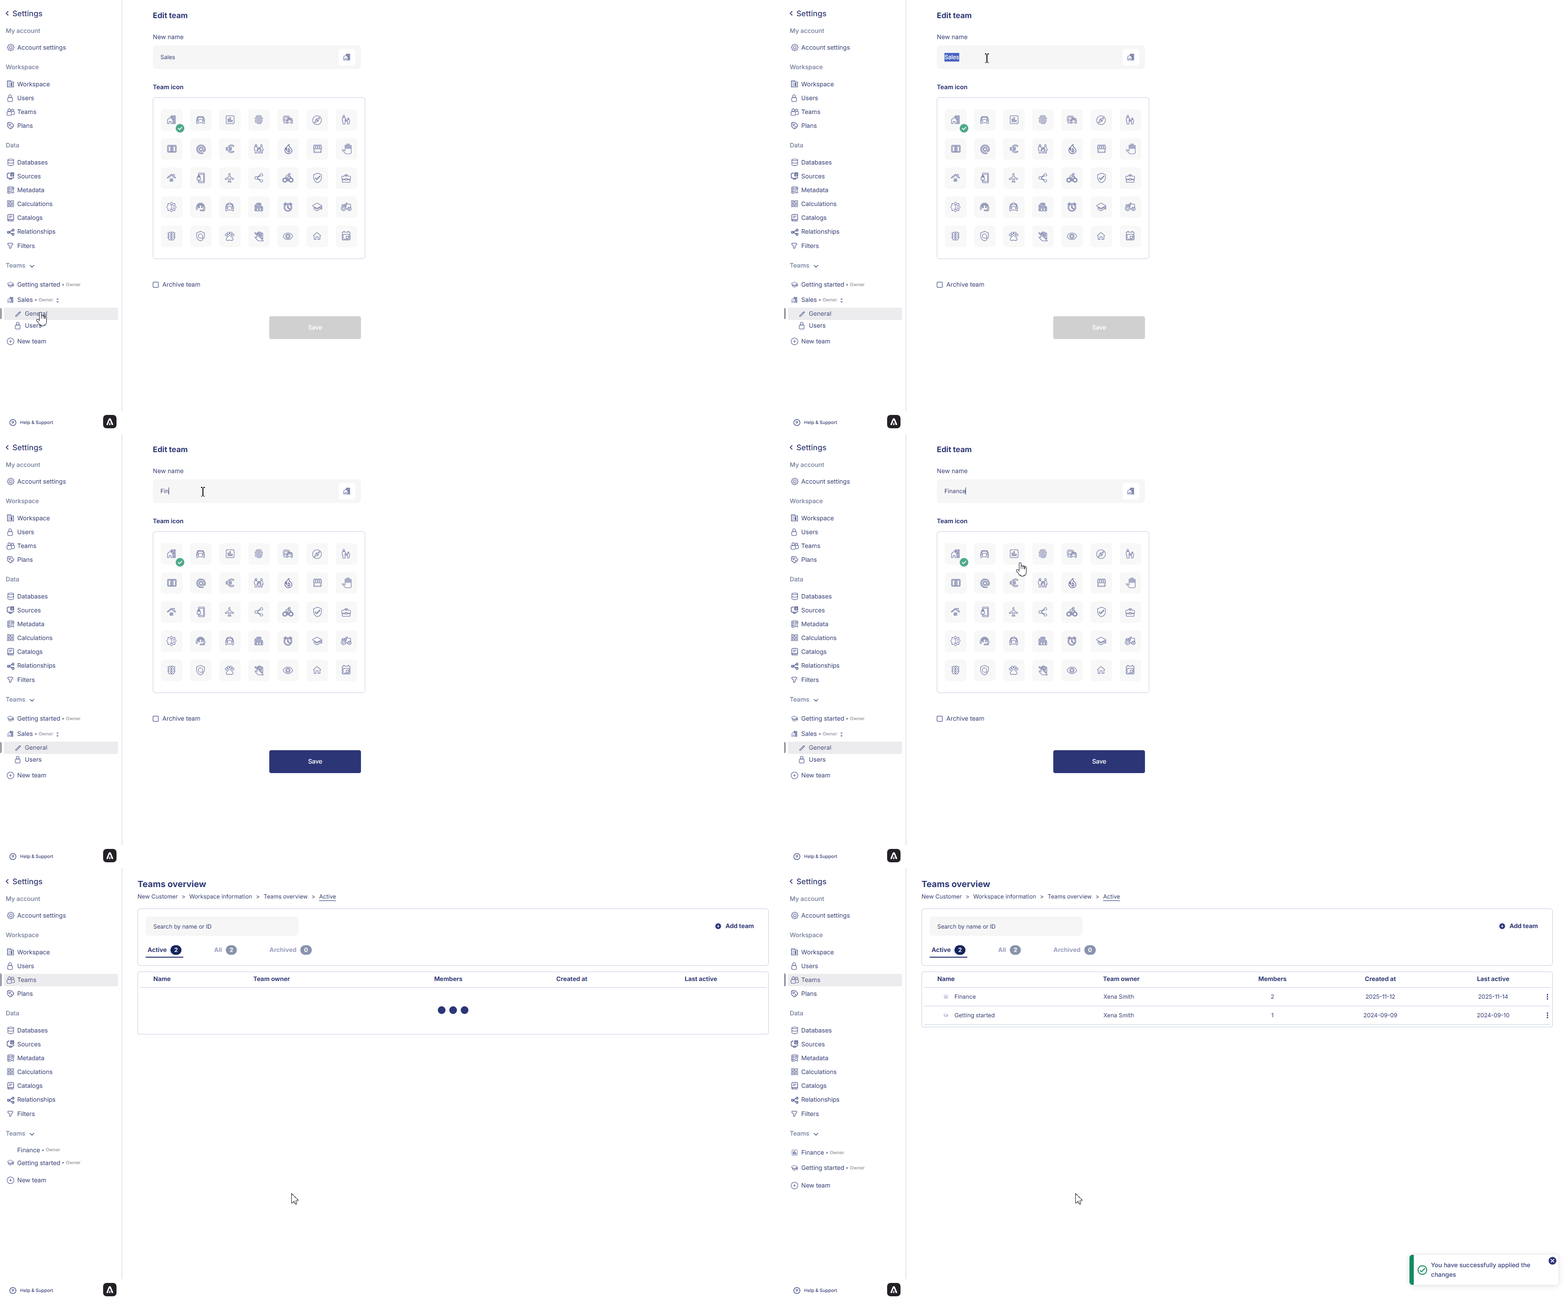
You can update team details or archive a team that is no longer active.
### Editing a team
1. Open **Settings** and select the **team name**.
2. Go to the **General** tab to update the team name or icon.
### Archiving a team
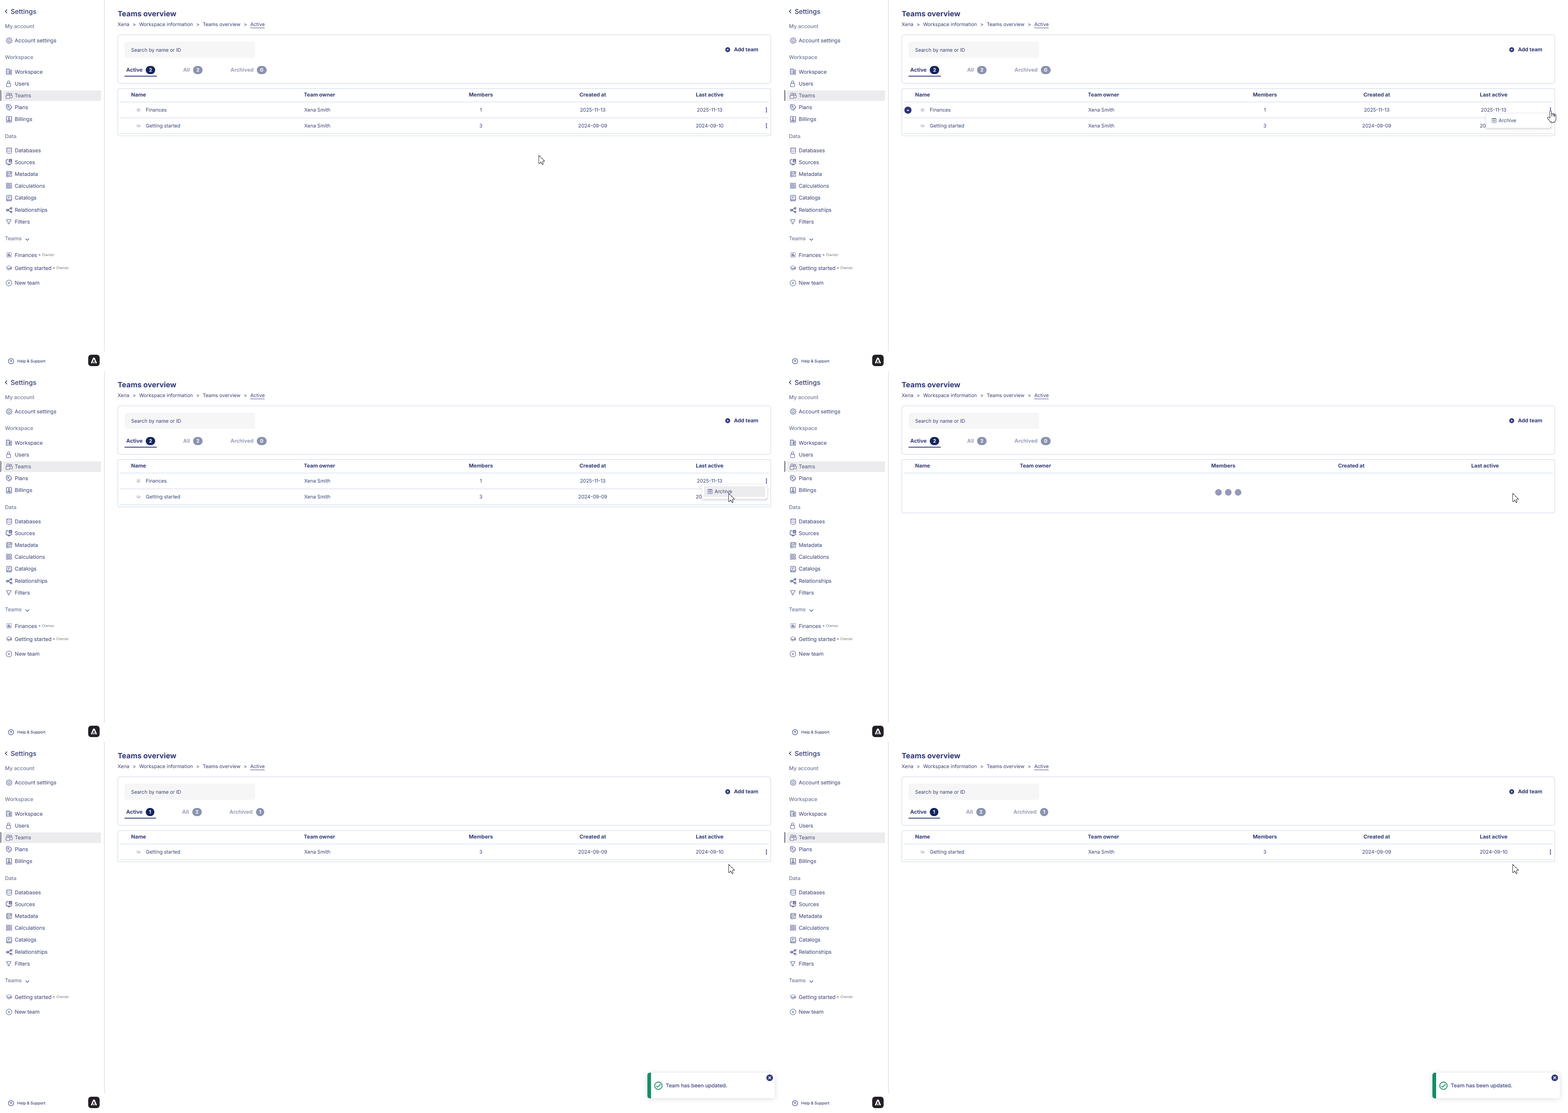
1. In the same **General** tab, select **Archive team**.
2. Click **Save** to confirm.\
The team will be moved to the archived list.
## Editing or archiving a team
You can update team details or archive a team that is no longer active.
### Editing a team
1. Open **Settings** and select the **team name**.
2. Go to the **General** tab to update the team name or icon.
### Archiving a team
1. In the same **General** tab, select **Archive team**.
2. Click **Save** to confirm.\
The team will be moved to the archived list.
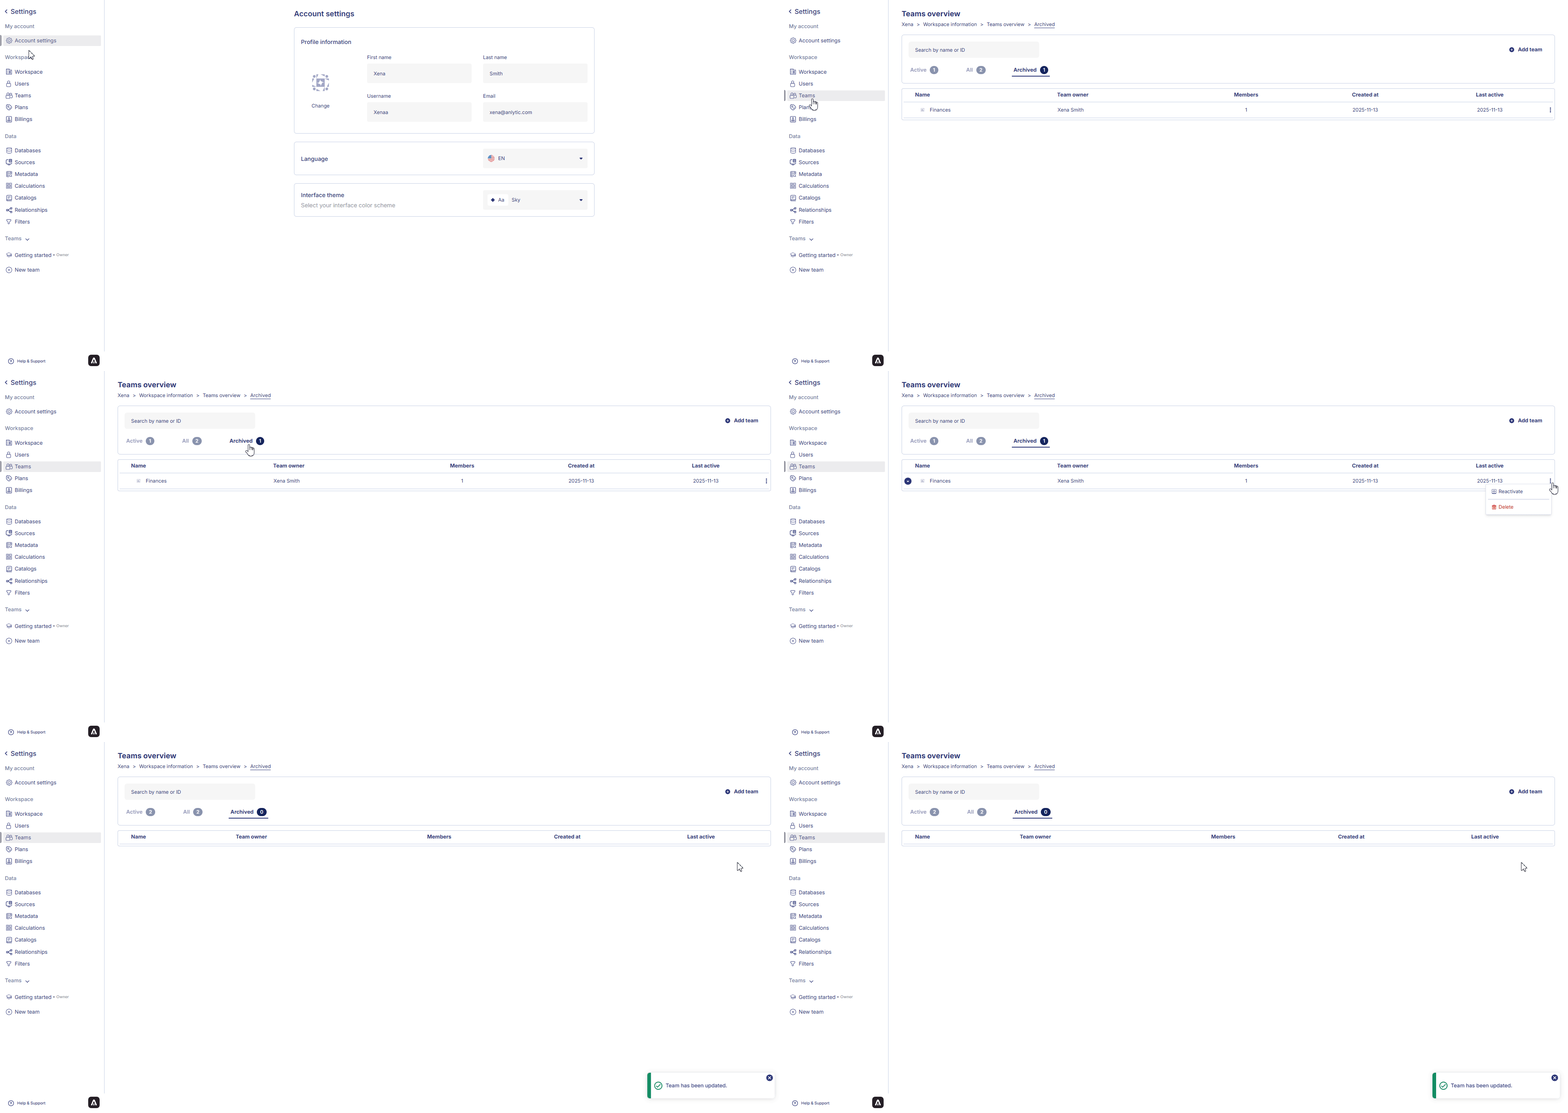
 ## Reactivating or deleting a team
Archived teams can be restored or permanently deleted.
1. In **Settings**, open the **Teams** section.
2. Select the **Archived teams** tab.
3. Click the **⫶** menu next to the archived team.
4. Choose **Reactivate** to restore the team or **Delete** to permanently remove it.
## Reactivating or deleting a team
Archived teams can be restored or permanently deleted.
1. In **Settings**, open the **Teams** section.
2. Select the **Archived teams** tab.
3. Click the **⫶** menu next to the archived team.
4. Choose **Reactivate** to restore the team or **Delete** to permanently remove it.
 Now that your team is set up, you can begin creating and sharing visualizations.\
The next section will guide you through creating your first graph.
Now that your team is set up, you can begin creating and sharing visualizations.\
The next section will guide you through creating your first graph.