Adding Users to the Workspace
Inviting users to your workspace is an essential step in enabling collaboration across your organization. Once users are added, they can access shared resources, participate in team workflows, and contribute to dashboards and visualizations. This section explains how to manage workspace members, including adding new users and removing existing ones.
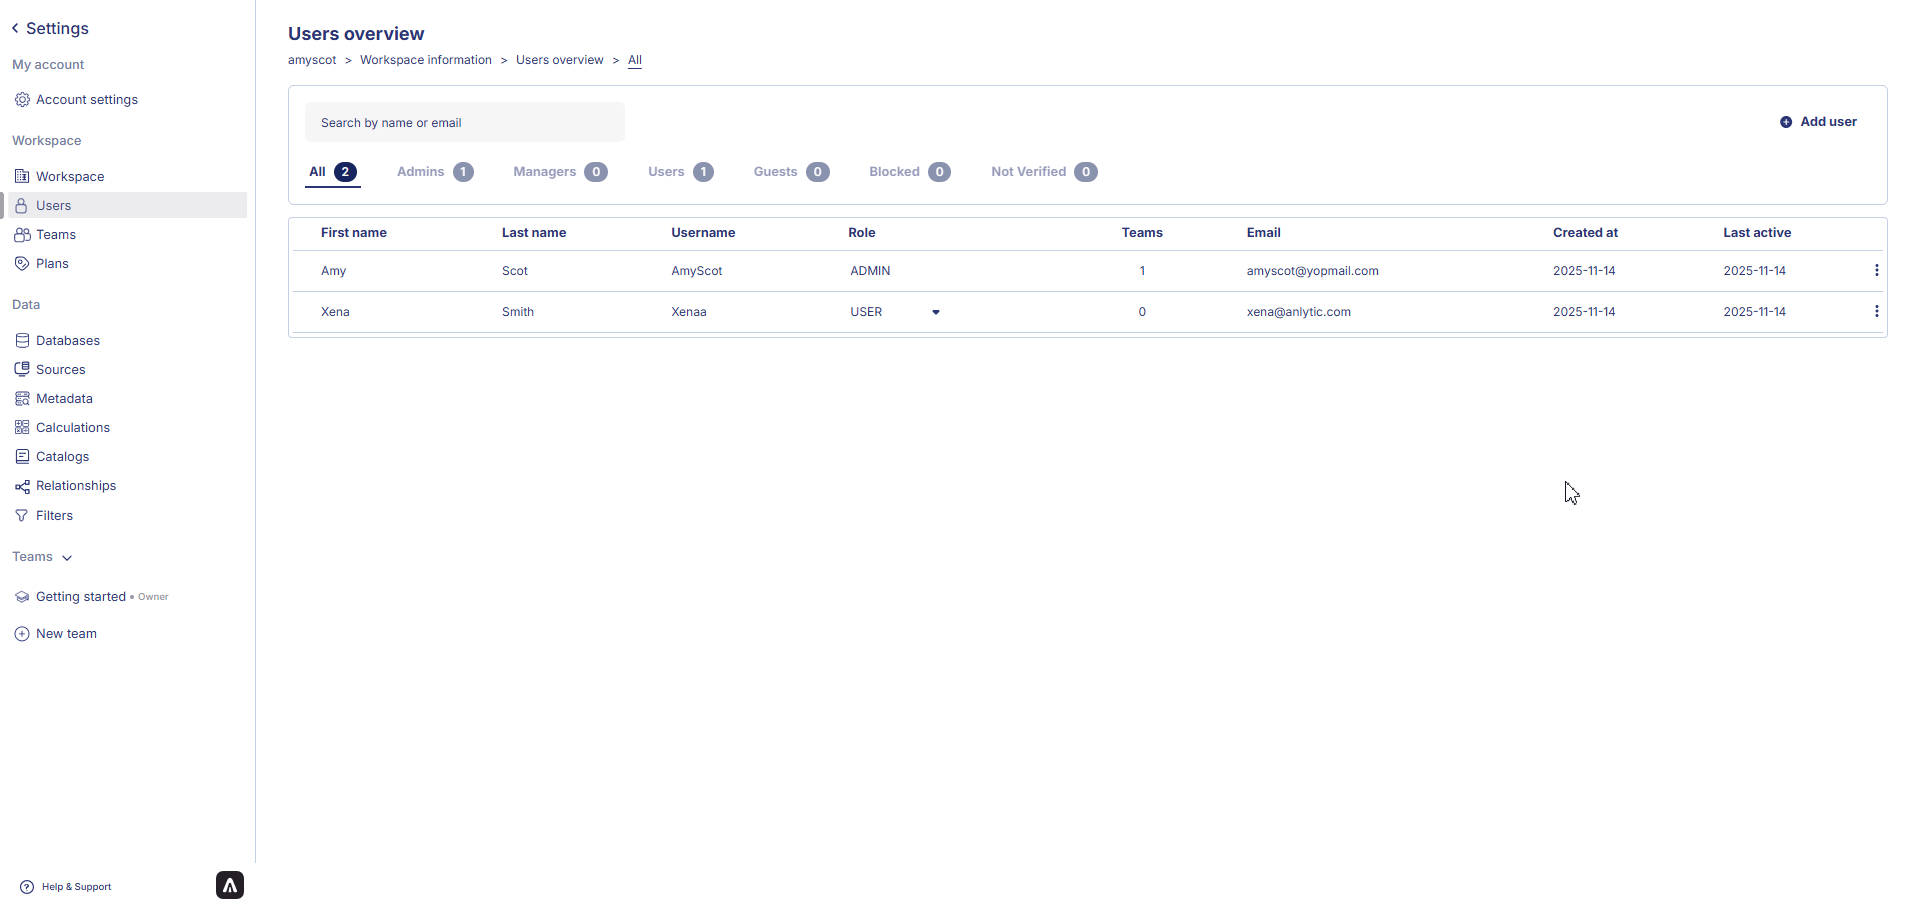
Adding users to the workspace
Follow the steps below to invite users and assign them the appropriate access level:
- Click the workspace name in the left-hand sidebar to open the workspace menu, then select Settings.
- In the Users section, click Add users to open the invitation panel.
- Enter the user’s email address and select one of the available roles (Guest, User, Manager, or Admin) based on the level of access you want to grant.
- Click Add to send the invitation and add the user to your workspace.
Once added, the user will immediately appear in the workspace users list and can be assigned to teams for more granular collaboration.
Removing a user from the workspace
If someone no longer requires access, you can remove them from the workspace to keep your environment secure and well-organized:
- Click the workspace name, open Settings, and navigate to the Users overview.
- Locate the user you want to remove, click the ⫶ menu next to their name, and select Delete.
- A Delete user confirmation dialog will appear.
Select Delete to permanently remove the user from the workspace, or choose Cancel if you do not want to proceed.
After adding users to the workspace, the next section will guide you through configuring teams and assigning members to roles that match your workflow.