Add Filters – Screen Overview
Before creating a filter, you must first navigate to the Filters configuration screen. Click on the name of the workspace.Click Settings.
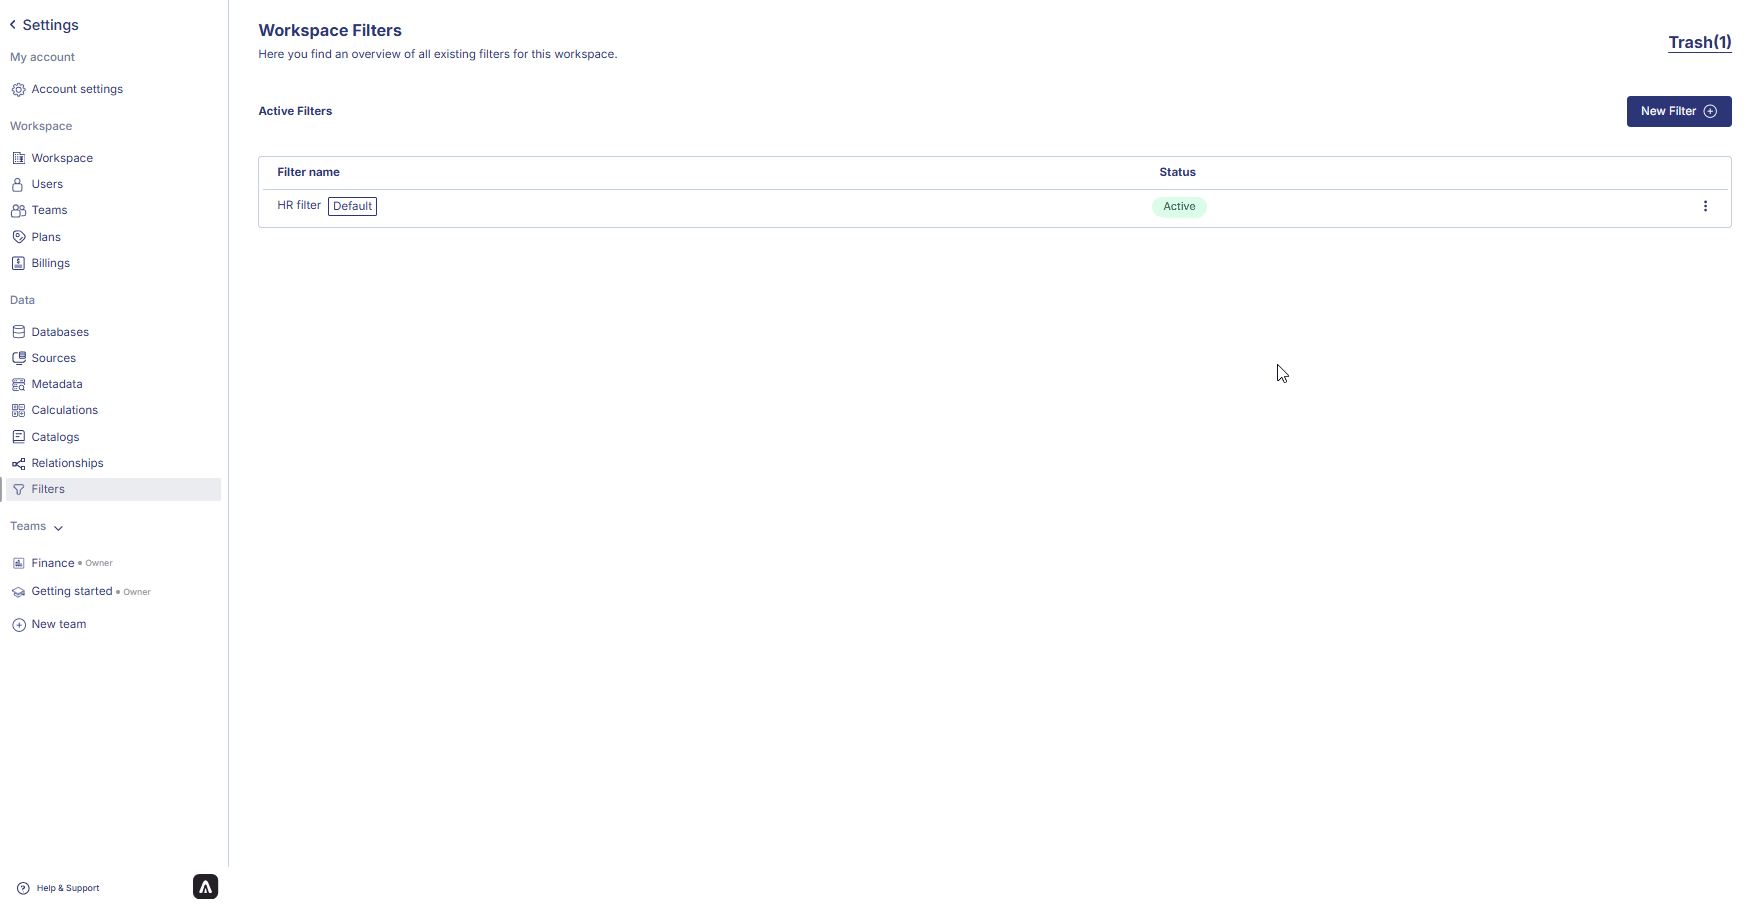
From the left-hand sidebar, click Filters to access the configuration area where filters are created. When creating a filter, you will see the Add Filters screen, containing:
- Filter Name
- Groups and Fields
- Add group button
- Add field button
- Preview panel
- Deploy button
Each filter can contain multiple groups or fields depending on your filtering requirements.
1. Create a Filter Name
At the top-right of the screen, enter a meaningful name for your filter.Using descriptive names helps users understand where and how the filter is used.
2. Add a Group
Groups help organize filters into logical sections. Each group can contain multiple levels and fields.2.1 Add a Group
- Click Add group.
- A new Add group panel appears.
- Select a Group Type from the dropdown.
Group Type Options
| Option | Description |
|---|---|
| INP | Standard text input field |
| INPUT | Generic input field (text/number) |
| RADIO | Radio button selection with predefined values |
2.2 Enter Group Name
Provide a clear group name, for example:- Category
- Department Selector
- Product Level
- Region Group
3. Configure Fields Within a Group
Each group contains Fields, which may include multiple levels (Category, Level 01, Level 02,…).3.1 Category Section
Each Category section includes:- Placeholder
- Add columns (choose column from your catalog)
- Value (default or selectable values)
- Description (explanation of how the field is used)
Example inputs
| Field | Example |
|---|---|
| Placeholder | “Enter category…” |
| Add columns | product_category |
| Value | Electronics, Furniture |
| Description | Filter by product category |
3.2 Level 01, Level 02, Level 03…
You can add additional levels if your filter requires hierarchical filtering (e.g., Region → Country → City).3.3 Add Level or Field to the Group
After entering all necessary information:- Click Add in the Group panel
- The group appears under Groups and fields
4. Add a Field (Without Group)
If you do not want to create a group, you can add a standalone field.4.1 Add Field
- Click Add field.
- Select a Field Type (INP / INPUT / RADIO / other types).
- Enter field details:
Field Details
| Field | Description |
|---|---|
| Field name | Display name for the filter |
| Select column type | Choose field type (String, Number, Boolean, etc.) |
| Placeholder | Text shown when field is empty |
| Add columns | Link to a source column |
| Value | Default or fixed values |
5. Preview the Filter
The right-side Preview panel displays a real-time representation of your filter.You can check:
- Group and level structure
- Field nesting
- Input types
- Default values
6. Deploy the Filter
Once your filter is ready:- Review the configuration
- Click Deploy
- The filter appears under Workspace Filters with status Active
- Edit a filter
- Set as Default
- Delete a filter (sent to Trash)
- Restore deleted filters
 This ensures consistent and standardized filtering logic across your workspace.