Setting up data connection involves connecting your data warehouse to the platform, adding meta data, creating relationships, creating formulas and organize data into a catalog.
In this section we are going to walk you through how to set up data connections in Anlytic platform.
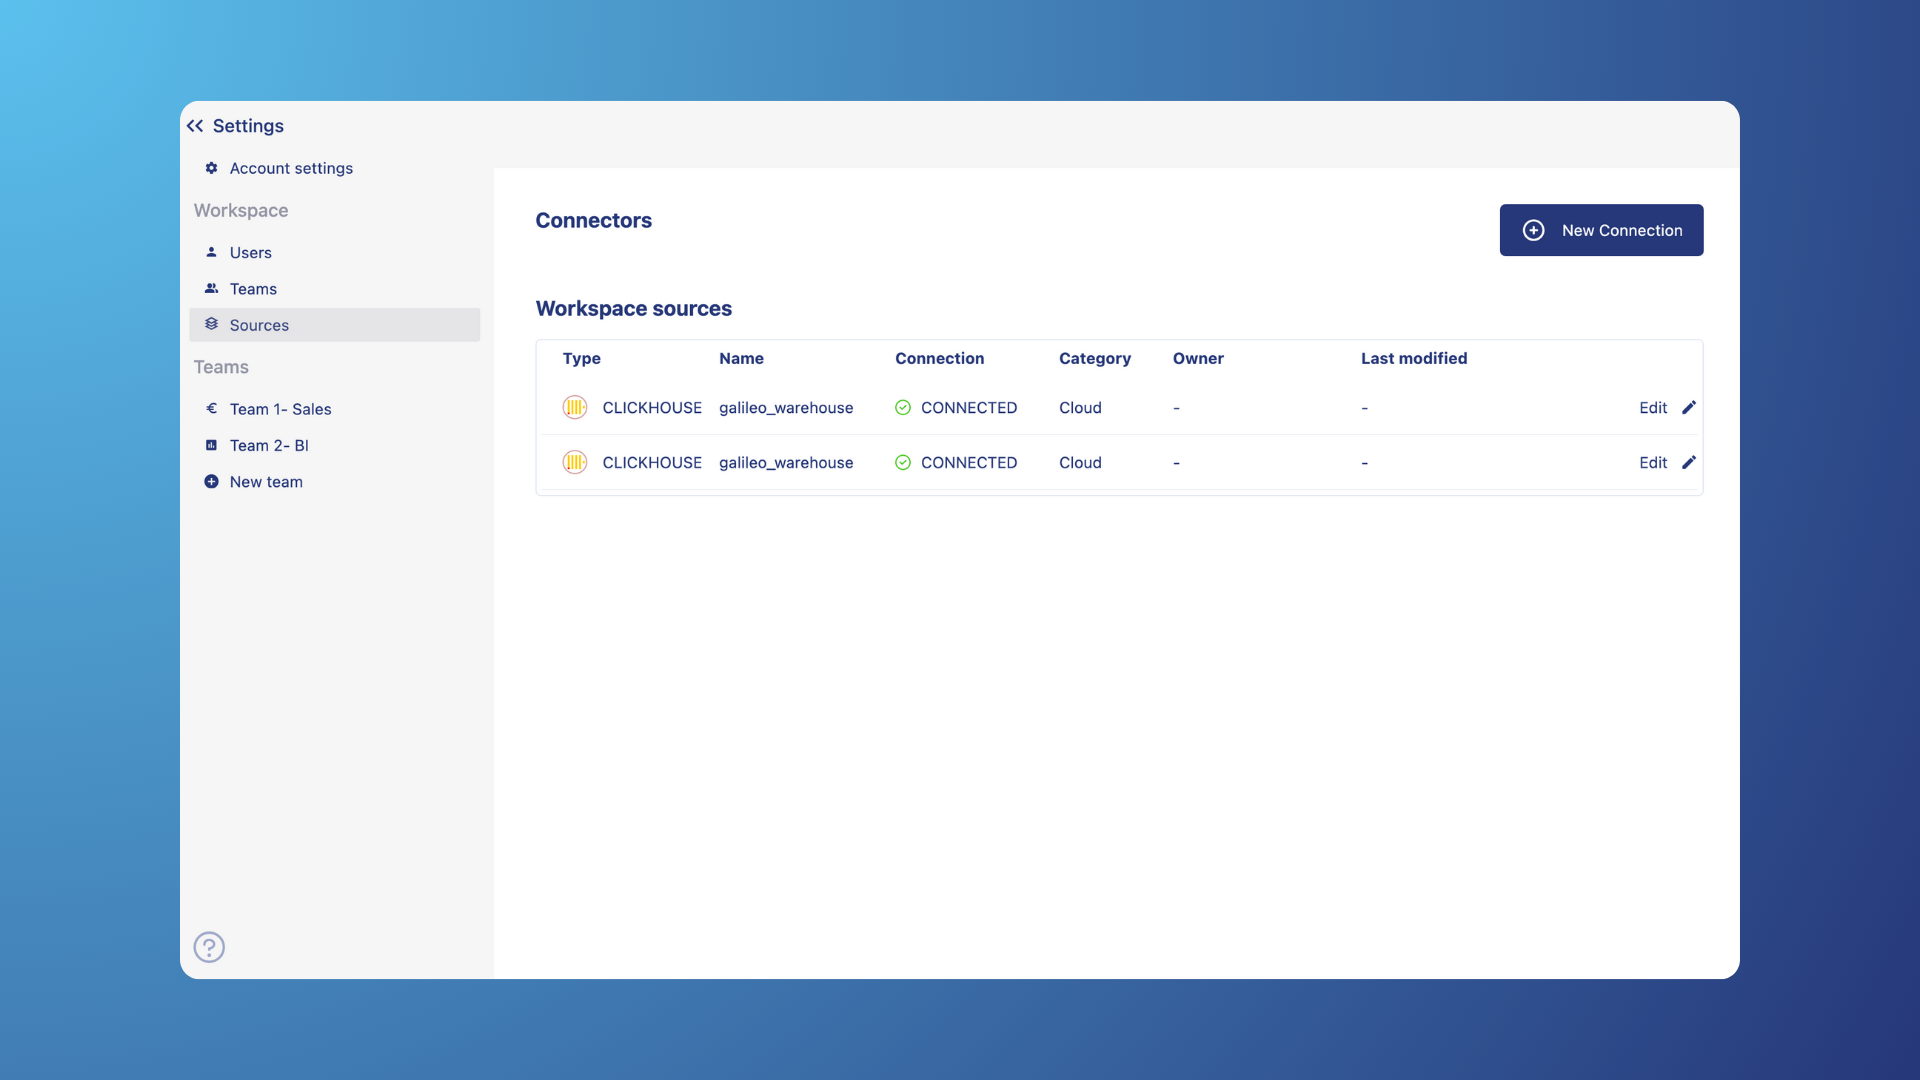
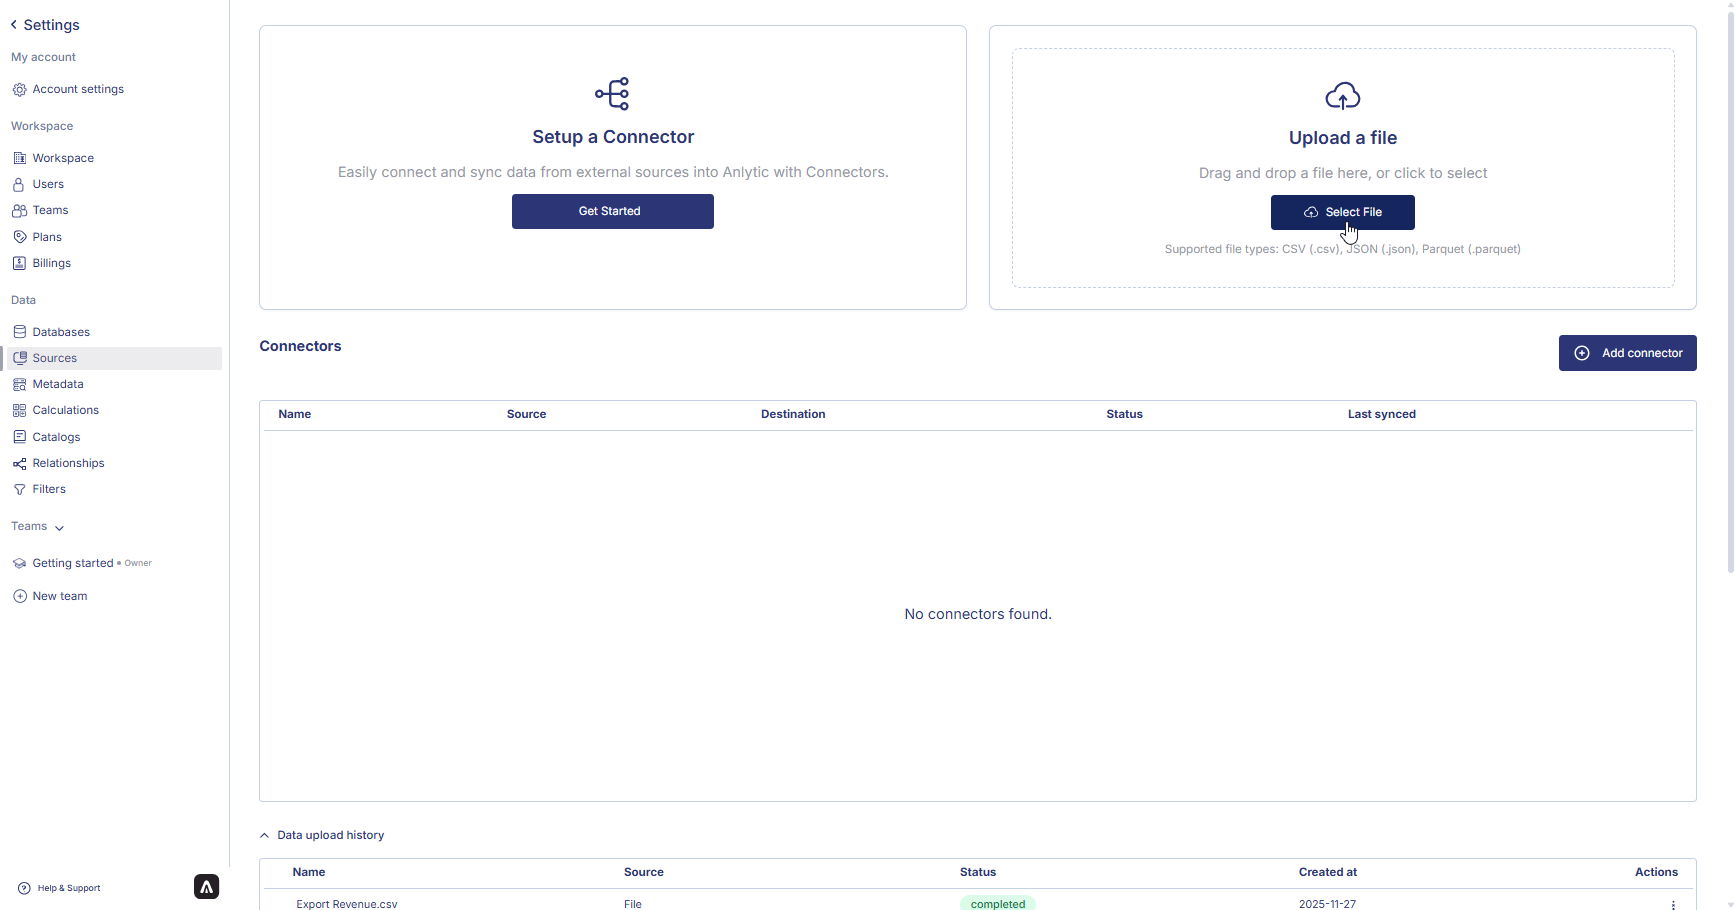
You can add new connection and find already existing connections overview under sources from the settings options.
](https://mintlify.s3.us-west-1.amazonaws.com/anlytic/Resources/data%20connection.gif)
How to set up data connection?
On top of the lefthand sidebar, you can see the name of the workspaces.
- Click on the
name of the workspace. An options menu will appear with the name of the workspaces, settings, create workspace and log out option. Click on settings. From the left-hand sidebar. Click on Databases. Click on the new connection button at the top right hand corner of the screen. Select the cloud data warehouse and click on save and continue. Add the connection credentials to your database and click on save and continue.
 Your connection to the database is established. You can click on save and continue to add meta data and eventually organize the data into a catalog.
Uploading a file as a data source
In addition to cloud databases, Anlytic allows you to upload files as data sources. This is useful when working with CSV, JSON, or Parquet files.
To upload a new file:
- Go to Sources in the left-hand sidebar under the Data section.
- In the Upload a file panel, drag and drop your file into the upload area, or click Select File to choose a file manually.
- Once the file is uploaded, a Configuration table will appear, showing all the columns detected from your file.
After the file is processed, configure how the data will be stored in Anlytic:
-
Choose where to upload data
Select whether you want to upload the data into a New table or an Existing table.
-
Select a database
Use the dropdown list to choose the target database where the new table will be created or where the selected existing table belongs.
-
Name your table
Provide a table name if you are creating a new table.
-
Review column settings
Each column appears in the Column settings section.
For every column, you can:
- Select Data type (Integer, Long text, Text, Boolean, Date, etc.)
- Set a Default value
- Set Nullable or Not nullable
- Mark a field as Primary key if needed
- Remove a column using the Delete icon
-
After confirming all settings, click Import to Anlytic.
An import status message will appear once processing is complete, showing whether the import succeeded of failed.
 Once your data is connected—either through a cloud database or through file upload—you can continue by adding metadata, creating relationships, building catalogs, and preparing your data for analysis in workbooks and visualizations.
 Last modified on March 13, 2026